
Introduction:
Rhinestones are a timeless and versatile embellishment that can add a touch of glamour and sophistication to any project. Whether you're a fashion designer, a DIY enthusiast, or a crafting professional, rhinestone design templates are a valuable tool in your creative arsenal. In this blog, we'll explore the art of creating stunning rhinestone design templates and offer tips and tricks to make your projects shine.
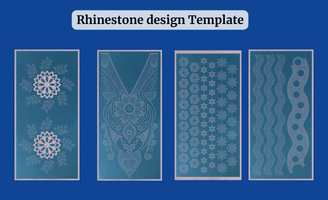
What Are Rhinestone Design Templates?
Rhinestone design templates are precise patterns or layouts that guide the placement of rhinestones onto various surfaces, such as clothing, accessories, home decor, and more. These templates serve as a blueprint for arranging rhinestones in intricate and eye-catching designs.
Materials You'll Need:
Before diving into creating your rhinestone design templates, gather the following materials:
-
Rhinestones: Choose rhinestones in various sizes, colors, and shapes to match your project's aesthetic.
-
Template Material: Options include rhinestone transfer paper, heat transfer vinyl (HTV), or adhesive-backed paper.
-
Design Software: Use graphic design software like Adobe Illustrator, CorelDRAW, or even free tools like Inkscape and Canva for creating your template.
-
Cutting Machine: If you plan to create intricate designs, a cutting machine like a Cricut or Silhouette can be incredibly helpful.
-
Application Tools: Tweezers, a rhinestone applicator, or a hotfix wand will aid in precise placement.
Steps to Create Rhinestone Design Templates:
1. Design Your Template:
- Open your design software and create your desired pattern or image. Keep in mind the size and placement of rhinestones.
- Convert your design into vector format for precise resizing without pixelation.
2. Choose Your Rhinestones:
- Select rhinestones that complement your design in terms of color, size, and shape.
- Ensure you have enough rhinestones to complete your template.
3. Prepare Your Template Material:
- Cut your template material to the desired size using scissors or a cutting machine.
- Ensure that the adhesive side (if applicable) is facing up.
4. Place Rhinestones:
- Apply rhinestones to your template material following your design. Tweezers or an applicator can help with precise placement.
- Ensure the rhinestones are snugly fitted to prevent gaps.
5. Transfer the Design:
- If using adhesive-backed paper, simply peel off the backing and adhere your design to your project.
- If using HTV or rhinestone transfer paper, follow the manufacturer's instructions for heat application.
Tips for Success:
- Test your template on a scrap piece of fabric or material before applying it to your final project.
- Keep your workspace clean and organized to prevent rhinestones from getting misplaced.
- Experiment with different rhinestone arrangements and colors to find the perfect look.
Conclusion:
Creating rhinestone design templates allows you to add a touch of elegance and sparkle to your projects. Whether you're embellishing clothing, accessories, or home decor, the possibilities are endless. With the right materials, tools, and a dash of creativity, you can turn your ideas into stunning rhinestone masterpieces that are sure to catch the eye and captivate the imagination. So, let your creativity shine and start designing your rhinestone templates today!